Basic Curves and Levels in Photoshop |
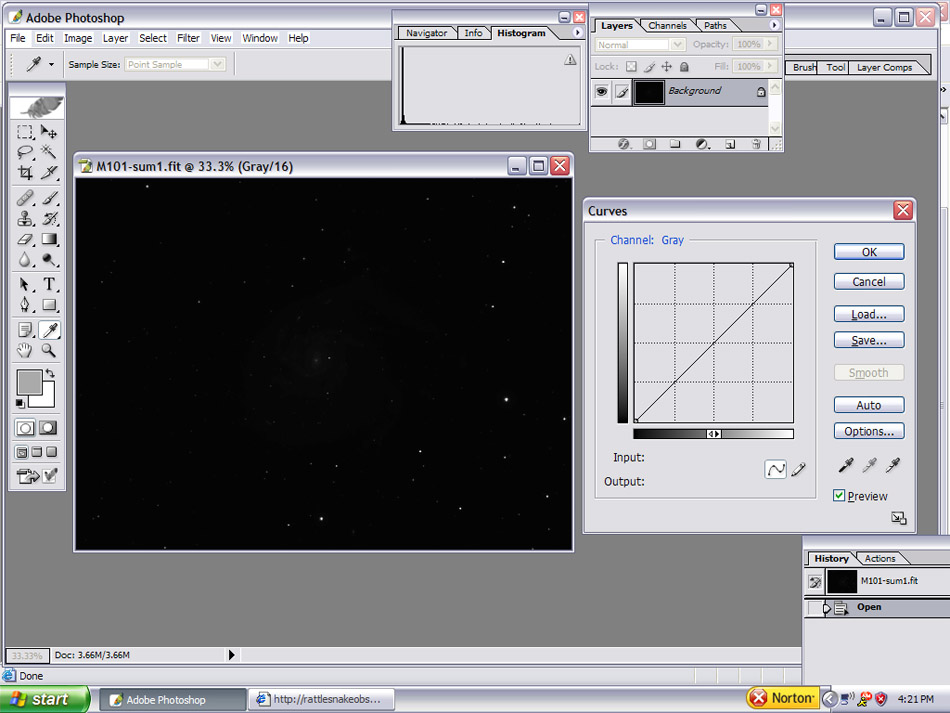
In the screen above we have opened the combined FITS file in Photoshop and then did
a "Ctrl-M" to pull up the curves window. As you can see the image is mostly
black and the tiny narrow histogram is squished up against the left side
indicating that it is in need of some serious stretching to bring out the data. |
This is a basic tutorial I put together for processing monochrome images in Photoshop.
It will be familiar territory to all but the first time users of PS
and beginning imagers. The reason I put it together was twofold. First
off because new astroimagers unfamiliar with Photoshop had asked me numerous
questions on getting started out in processing. Secondly, when I started
CCD imaging all I knew about PS was how to double-click the desktop icon and
start the program. I still dont know much more than that but I have had
some success processing monochrome images. So, this little tutorial is by
a novice, for a novice. Please feel free to correct any bad advice or bad
techniques that I may be spreading. After you have captured your data and calibrated you sub-exposures with darks, or darks and flats, done hot and dead pixel removal, and stacked the subs, and saved the file as a 32 bit FITS, its time to open the combined image in Photoshop. |
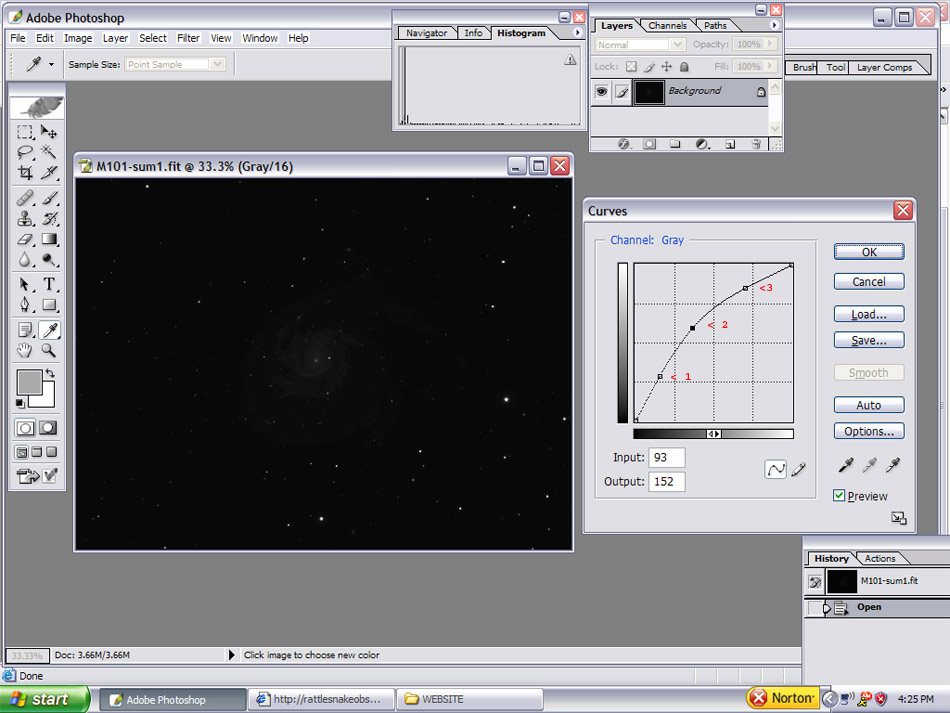
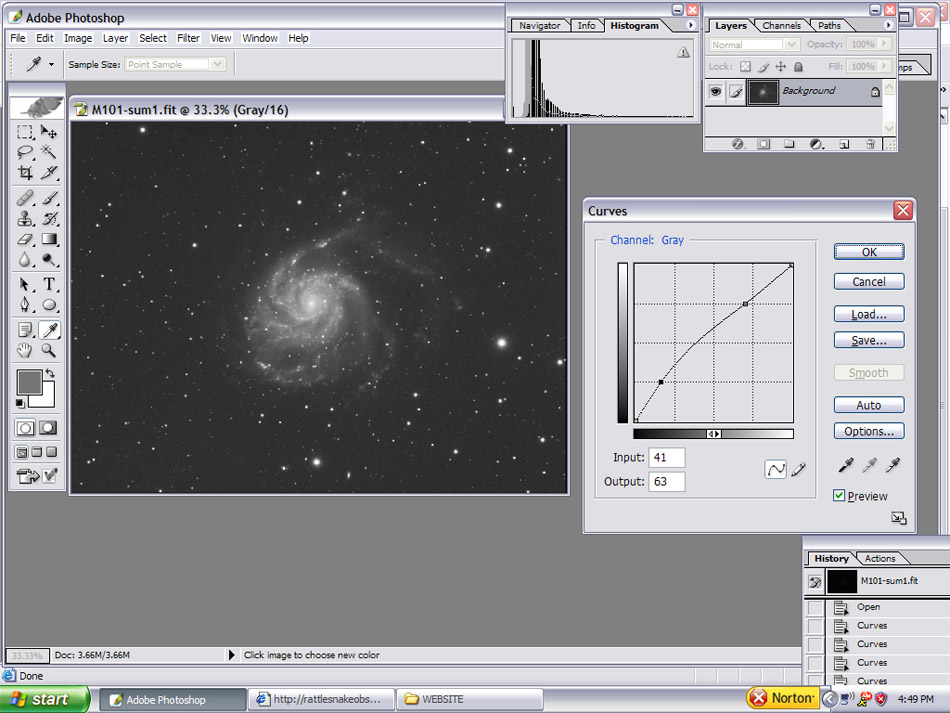
I first selected and grabbed the point on the curves line (1) and pushed it straight
up thus stretching the dimmest portions of the image. Then I grabbed the point at (2) pushing it up very slightly stretching the mid-tones just a little bit more. Finally I grabbed the point at (3) and brought it DOWN to flatten out the curve above it to keep the brightest portions of the image from getting blown out as we go through further iterations of this process. Please note that you dont have to use 3 points. If you wish you can use only 1 and 3 but I have found that for the first iterations of stretching using point 2 in addition to one a three preserves a decent contrast for when you do you final tweaking of curves. As you can see the image is starting to show itself, so push the (OK) button, then do another "Ctrl-M" to bring up the curves window once again. |

In the above screen we did another of the same basic iteration as last time, further
stretching and moving the histogram to the right, and revealing more of the
image. Be patient as it will take quite a few more iterations of curves.
So go through a few more iterations and then you will see something akin
to the screen below with a very grey backround in the image |
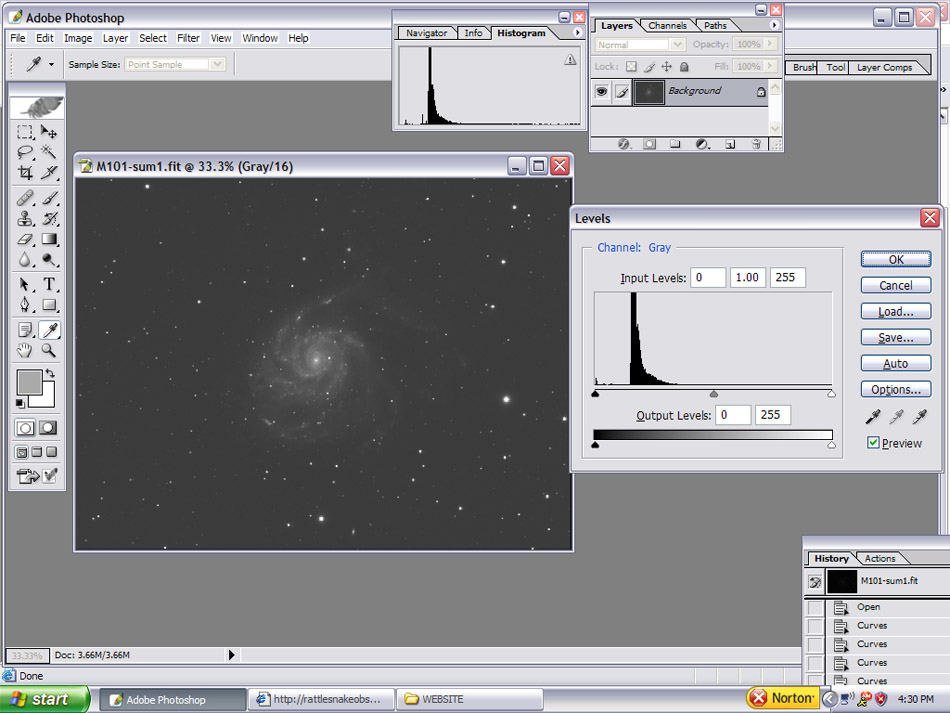
The above screen show the object starting to take shape, but also a very grey backround
which is the result of stretching the histogram as it also moves to right.
Now is when you want to open up the Levels window by hitting "Ctrl-L"
You can see how the histogram has moved well right of the black point slider
in the Levels window. What you want to do next is move the black point
slider towards the histogram as in the screen below |
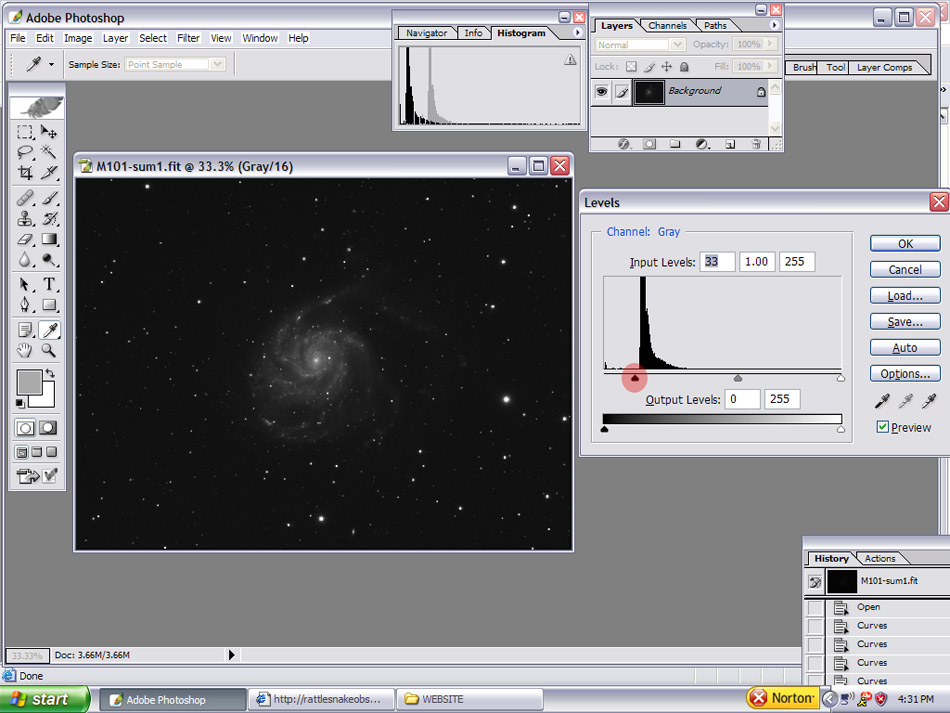
Drag the blackpoint slider (highlighted in red) towards the edge of the histogram.
Leave a little room as you do not want to actually touch the slider to
the histogram or you risk (clipping) or throwing away some of your hard earned
dim data. As you can tell now, the backround has darkened to acceptable levels. |
In the above screen I have done several more iterations of curves to bring out more
of the data. You may use either 2 or 3 points to stretch the curve. experiment
and see what gives you the best result as it will vary from image to image. |
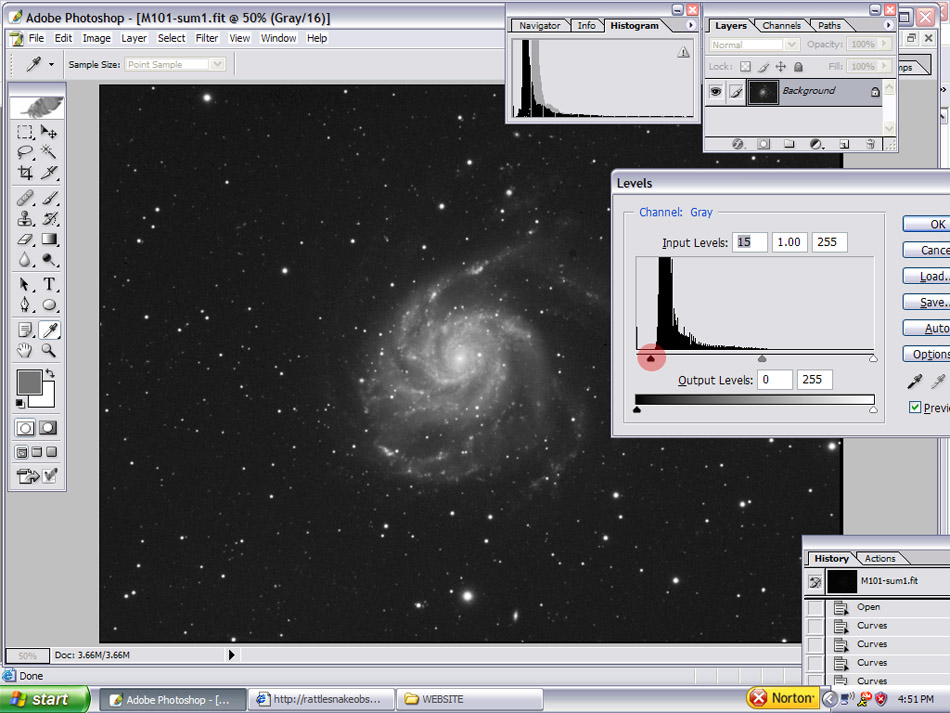
In the above screen I once again opened Levels "Ctrl-L" and moved the black point
slider next to the edge of the histogram. Remember dont get too close to
the edge of the histogram with that slider, leave a little space. The backround
now looks to be a nice shade of dark grey, akin to the real sky backround.
You do not want your backround totally black because that is not a accurate
representation and also by doing so you will wind up clipping some data.
You are now pretty much where you want to be with regards to the major curves
adjustment. All you need to to now is fine tune the curves with very
small movements to get a nice depth to the object as in the screen below. |
After I get things looking pretty good I will do a final adjustment to curves that
adds a little "punch" to the image as in the above screen. I anchor the
curve right in the middle, then pull down the black point a little, then raise
the white point slightly. This is akin to boosting contrast and should be
one of you final curves adjustments. Remember, dont get too out of contro
here, you do not want a black backround, nor do you want washed out bright points,
use restraint. The image is now looking pretty good, but there's still
work to do. You must sharpen the object of interest and then blur any
noise in the backround or in dim features. Part 2 will explain how this
is done. |